- Direct from the grower
- Freshly shipped
- Quick delivery & pick-up point
- Spicy support

Make your own fermented hot sauce with this kit! Fermentation gives your hot sauce that extra deep flavor explosion. Is it hard? Not at all! Get started right away with this kit to make a Habanero Hot Sauce or Mexican Chili Hot Sauce with dried chili peppers. You can find the recipes for these sauces below. Or, order the fermentation kit separately and get creative with your favorite peppers. Don't have any sauce bottles at home to store your homemade hot sauce? Order them here.
– So, what actually happens during fermentation?
Microorganisms break down or change molecules in food, creating awesome new flavors. For instance, peppers naturally have lactic acid bacteria on them. These bacteria multiply super fast during fermentation, thanks to the conditions in the jar. As these lactic acid bacteria grow, they feed on the sugars in the peppers. This makes the peppers and their brine acidic, which preserves them and makes them even tastier! Once the pH drops below 4.5, other bacteria can't survive. This new acidity changes the peppers' taste, smell, and look, giving you a much more delicious hot sauce!
– What's in the kit?
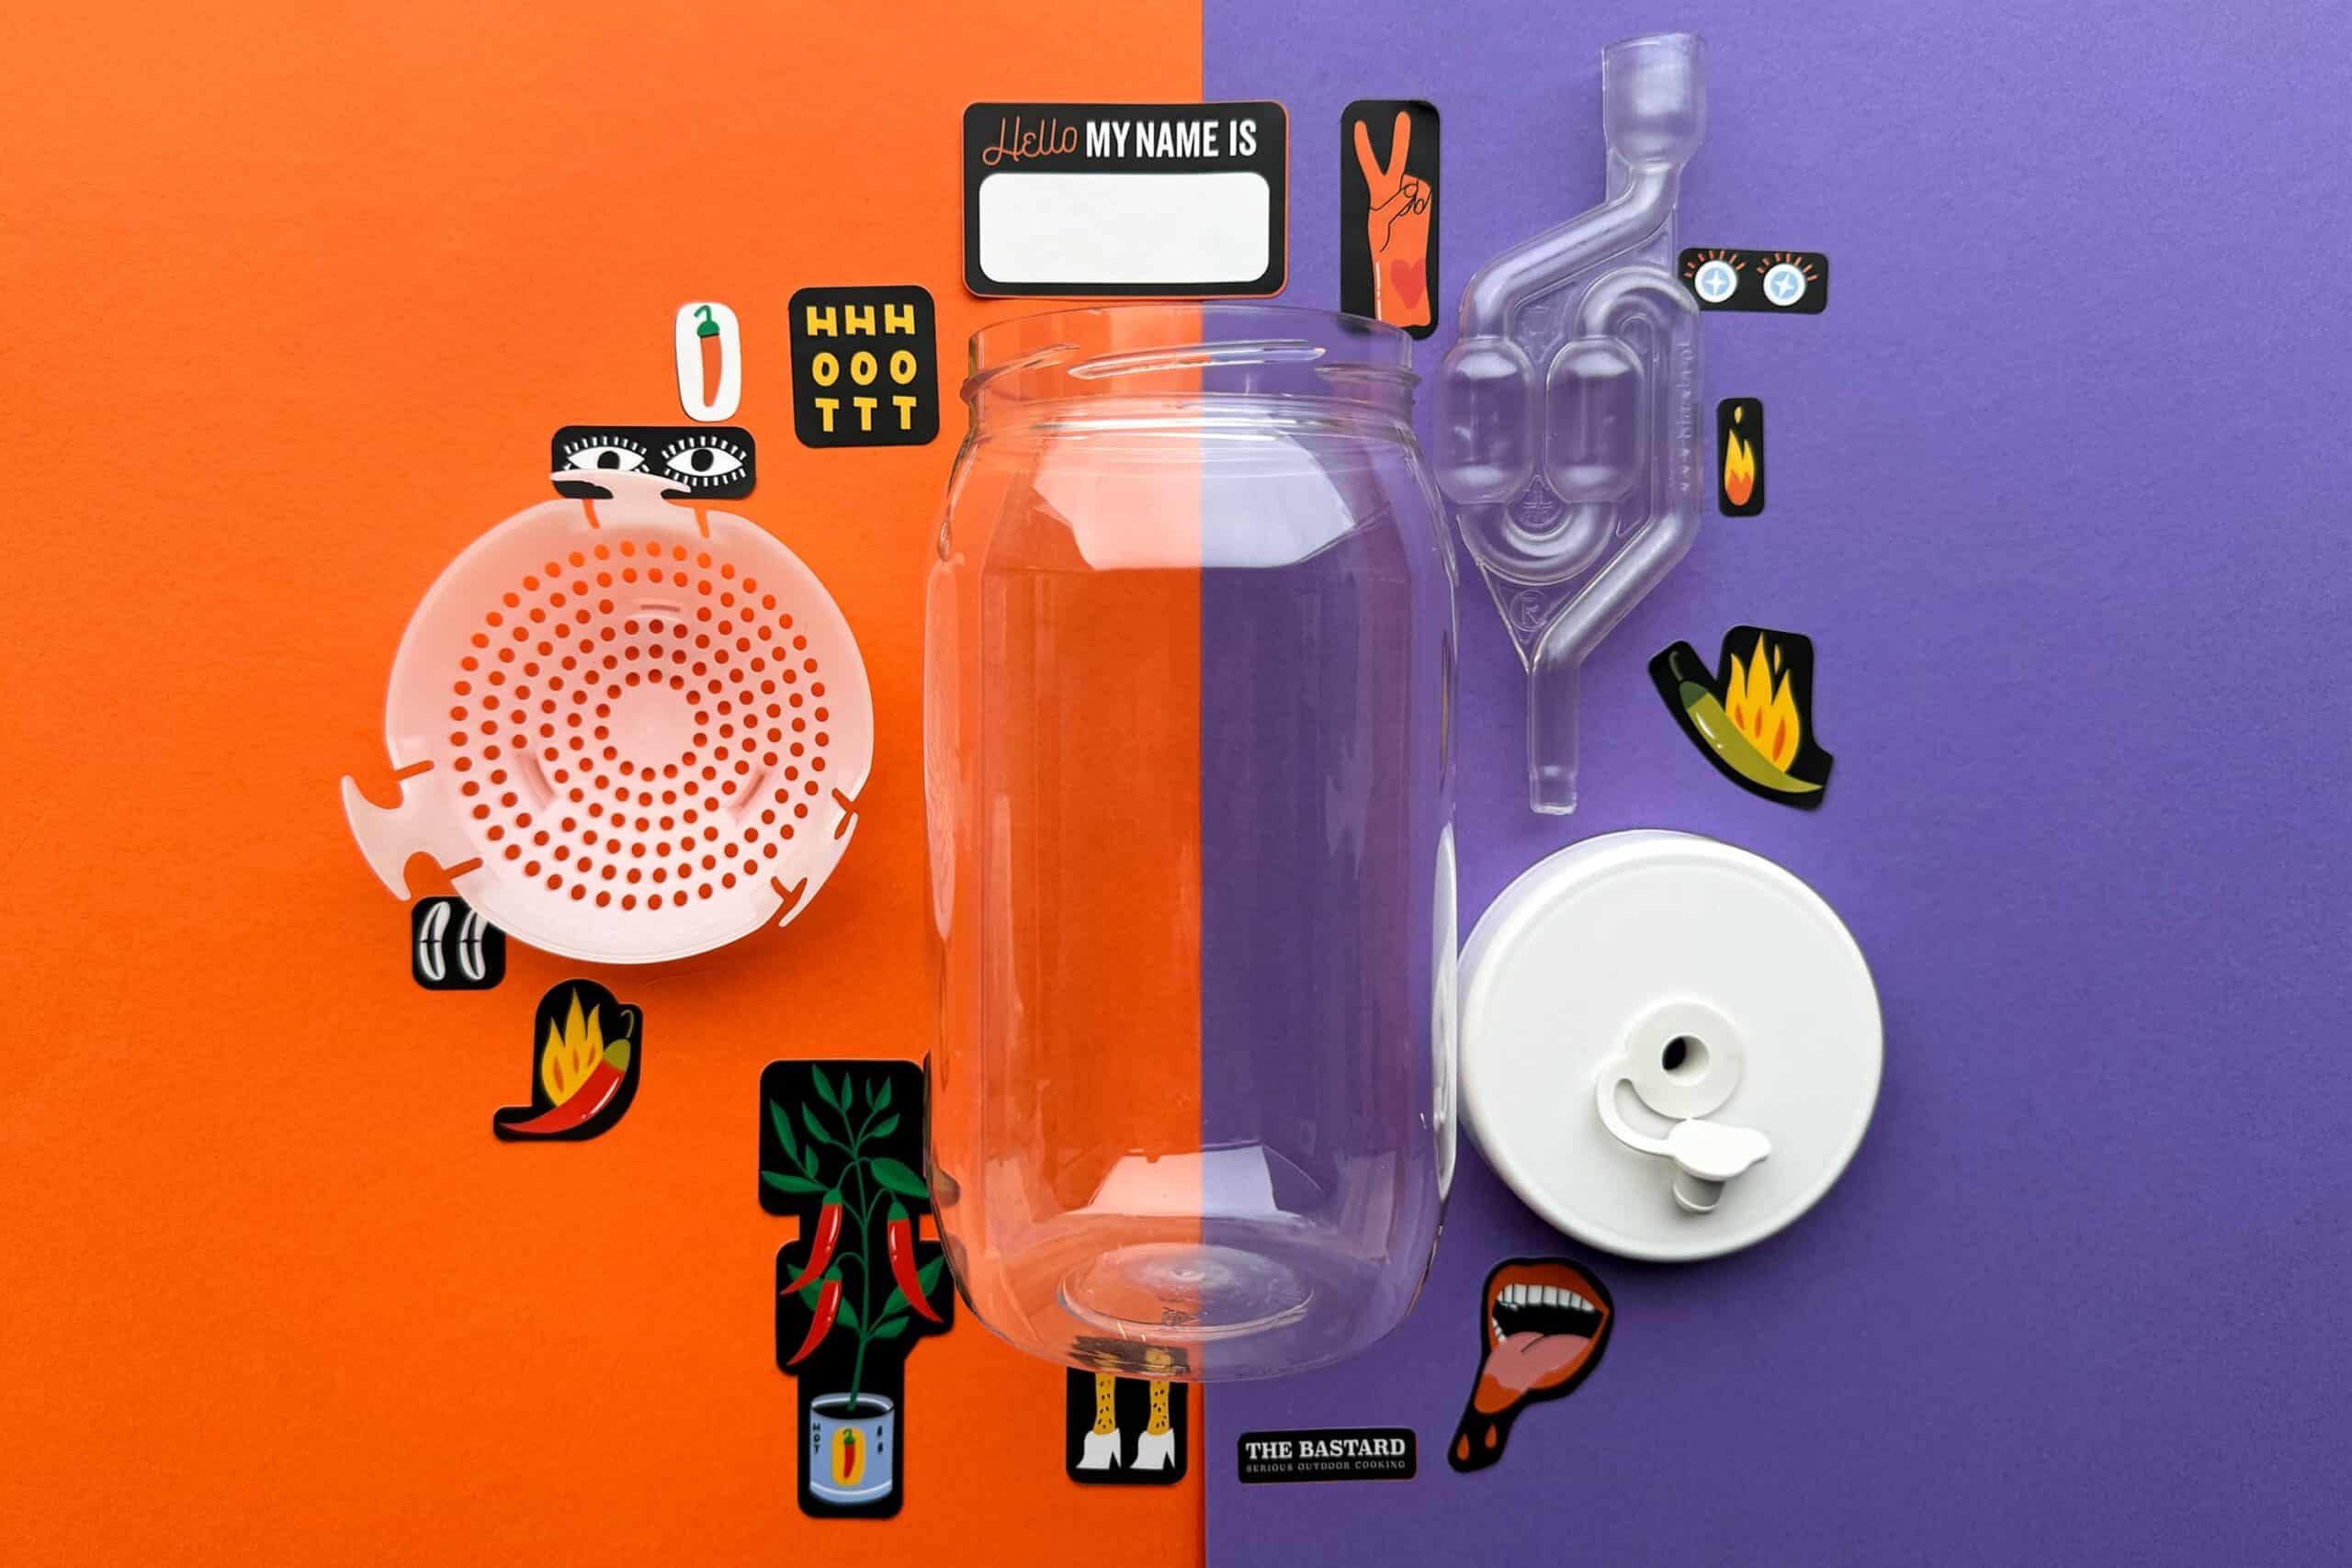
The fermentation kit includes a plastic canning jar/fermentation bottle. The jar's lid has a stopper where an airlock can be attached. With a regular lid, too much pressure can build up, causing the lid to pop off or even the whole jar to explode. Not very practical, which is why there's an airlock. It also includes a press/follower element, which makes sure the fermenting ingredients stay submerged, otherwise they might get moldy.
How to use your fermentation kit:
Step 1: Thoroughly clean the jar, lid, airlock, and press element with dish soap and hot water (up to 70 degrees Celsius; higher temperatures may deform the jar). Ingredients only need to be rinsed.
Step 2: Rinse the fermentation kit well with water and dry it with paper or a clean, dry tea towel. Pay attention, this is super important: after this, don't touch the inside of the jar with your hands.
Step 3: Fill the jar with your chosen recipe or your own creation. Spread the legs of the press element, place it on top of your ferment so it presses down. Tighten the lid well, place the airlock on the lid, and fill the airlock with water.
Step 4: Let the jar ferment for at least 10 days at room temperature in a dark place (away from direct sunlight). You can ferment it for longer than 10 days too; it usually takes about 5 days for the fermentation process to kick off.
Step 5: Drain the ferment using the press element and continue with your recipe.
– After fermenting your hot sauce, repeat steps 1 and 2. Keep your fermentation kit dry and clean, and it'll be ready for your next hot sauce in no time!
Basic Tips:
– Use clean produce, free from mold and spoilage. Fermenting can't bring products back to life, so only use ingredients you'd eat raw.
– Ingredients + water + 2% sea salt of the total fermentation weight. It's important that the salt is pure and unprocessed, which is why we recommend sea salt.
– Fill the jar until the ingredients are submerged and no oxygen can get in. Do this using the press element.
– It's best to keep your fermentation between 20 and 28 °C in a dark place (away from direct sunlight). If the temperature is too cold, your hot sauce won't ferment, and too high a temperature can spoil the fermentation.
– Done fermenting, but unsure if the final product is good? We recommend throwing it out and starting over; don't take any risks here. Failing is part of success, so if it didn't quite work out, you've got a good reason to try again. Fermenting is a learning process, and every failure is a step closer to your ultimate hot sauce!
——————————————————————————————————————————–
Recipe 1: Habanero Hot Sauce
Ingredients:
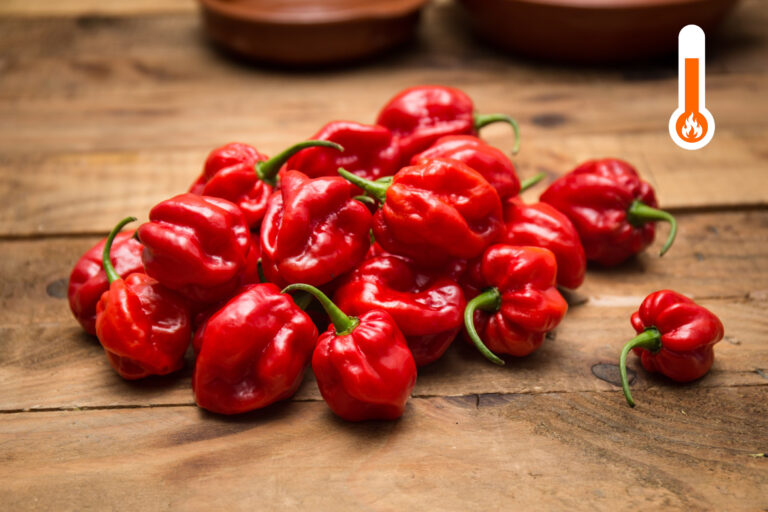
– 550g red Habanero chili peppers
– 3 cloves of garlic
– 425ml water
– 20g sea salt (2% of the total fermentation weight)
Add after fermentation
– 200ml apple cider vinegar
– 50g sugar
1. First, remove the stems from the chili peppers and cut the garlic into quarters. Pop the habaneros, garlic, and water into a blender or use an immersion blender to quickly mix them into a coarse sauce.
2. Pour this into the jar. Spread the legs of the press element, placing it so the sauce is pushed down. Close the lid tightly, put the airlock on top, and fill it with water.
3. Let the jar ferment for at least 10 days at room temperature in a dark spot (away from direct sunlight). We suggest a top shelf in your kitchen, as it's usually a bit warmer there. You can ferment it for longer than 10 days too; it typically takes about 5 days for the fermentation process to really get going.
4. Drain the fermented mixture, but make sure to save 200ml of the liquid. Add this liquid back to the fermented mixture along with 200ml of apple cider vinegar and 50 grams of sugar. Blend it with a blender or immersion blender until you get an even smoother sauce. Give it a taste and add more sugar and/or vinegar if you like. You can strain it if you want it super smooth, or keep it chunky for extra texture!
5. Bring the sauce to a boil and let it gently simmer for 5 minutes. This stops the fermentation, making your sauce last longer in the fridge. If you think it's too thin, you can thicken it with your favorite binder, like cornstarch.
6. Pour the sauce into a clean bottle or jar and screw on the lid. Flip the jar or bottle upside down to create a vacuum seal. Let the sauce cool down, then store it in the fridge.
——————————————————————————————————————————–
Recipe 2: Mexican Chili Hot Sauce
Ingredients:
– 55g dried Mexican chili peppers (2x Ancho, 4x Chipotle, 2x Arbol)
– 5g cumin seeds
– 6 cloves of garlic
– 750ml water
– 16.5g sea salt (2% of the total fermentation weight)
Add after fermentation
– 250ml apple cider vinegar
– 60g sugar
1. First, remove the stems from the dried chili peppers and cut the garlic into quarters. Briefly roast the cumin seeds and dried peppers – this really helps give your Mexican hot sauce a deeper flavor!
2. Pop all the ingredients into the jar. Spread the legs of the press element, making sure all the peppers stay submerged. Close the lid tightly, put the airlock on top, and fill it with water.
3. Let the jar ferment for at least 10 days at room temperature in a dark spot (away from direct sunlight). We suggest a top shelf in your kitchen, as it's usually a bit warmer there. You can ferment it for longer than 10 days too; it typically takes about 5 days for the fermentation process to really get going.
4. Drain the fermented mixture, but make sure to save 250ml of the liquid. Add this liquid back to the fermented mixture along with 250ml of apple cider vinegar and 60 grams of sugar. Blend it with a blender or immersion blender until you get a smooth sauce. Give it a taste and add more sugar and/or vinegar if you like. You can strain it if you want it super smooth, or keep it chunky for extra texture!
5. Bring the sauce to a boil and let it gently simmer for 5 minutes. This stops the fermentation, making your sauce last longer in the fridge. If you think it's too thin, you can thicken it with your favorite binder, like cornstarch.
6. Pour the sauce into a clean bottle or jar and screw on the lid. Flip the jar upside down to create a vacuum seal. Let the sauce cool down, then store it in the fridge.
Starting from € 9,25
Make your own fermented hot sauce with this kit! Fermentation gives your hot sauce that extra deep flavor explosion. Is it hard? Not at all! Get started right away with this kit to make a Habanero Hot Sauce or Mexican Chili Hot Sauce with dried chili peppers. You can find the recipes for these sauces below. Or, order the fermentation kit separately and get creative with your favorite peppers. Don't have any sauce bottles at home to store your homemade hot sauce? Order them here.
– So, what actually happens during fermentation?
Microorganisms break down or change molecules in food, creating awesome new flavors. For instance, peppers naturally have lactic acid bacteria on them. These bacteria multiply super fast during fermentation, thanks to the conditions in the jar. As these lactic acid bacteria grow, they feed on the sugars in the peppers. This makes the peppers and their brine acidic, which preserves them and makes them even tastier! Once the pH drops below 4.5, other bacteria can't survive. This new acidity changes the peppers' taste, smell, and look, giving you a much more delicious hot sauce!
– What's in the kit?
The fermentation kit includes a plastic canning jar/fermentation bottle. The jar's lid has a stopper where an airlock can be attached. With a regular lid, too much pressure can build up, causing the lid to pop off or even the whole jar to explode. Not very practical, which is why there's an airlock. It also includes a press/follower element, which makes sure the fermenting ingredients stay submerged, otherwise they might get moldy.
How to use your fermentation kit:
Step 1: Thoroughly clean the jar, lid, airlock, and press element with dish soap and hot water (up to 70 degrees Celsius; higher temperatures may deform the jar). Ingredients only need to be rinsed.
Step 2: Rinse the fermentation kit well with water and dry it with paper or a clean, dry tea towel. Pay attention, this is super important: after this, don't touch the inside of the jar with your hands.
Step 3: Fill the jar with your chosen recipe or your own creation. Spread the legs of the press element, place it on top of your ferment so it presses down. Tighten the lid well, place the airlock on the lid, and fill the airlock with water.
Step 4: Let the jar ferment for at least 10 days at room temperature in a dark place (away from direct sunlight). You can ferment it for longer than 10 days too; it usually takes about 5 days for the fermentation process to kick off.
Step 5: Drain the ferment using the press element and continue with your recipe.
– After fermenting your hot sauce, repeat steps 1 and 2. Keep your fermentation kit dry and clean, and it'll be ready for your next hot sauce in no time!
Basic Tips:
– Use clean produce, free from mold and spoilage. Fermenting can't bring products back to life, so only use ingredients you'd eat raw.
– Ingredients + water + 2% sea salt of the total fermentation weight. It's important that the salt is pure and unprocessed, which is why we recommend sea salt.
– Fill the jar until the ingredients are submerged and no oxygen can get in. Do this using the press element.
– It's best to keep your fermentation between 20 and 28 °C in a dark place (away from direct sunlight). If the temperature is too cold, your hot sauce won't ferment, and too high a temperature can spoil the fermentation.
– Done fermenting, but unsure if the final product is good? We recommend throwing it out and starting over; don't take any risks here. Failing is part of success, so if it didn't quite work out, you've got a good reason to try again. Fermenting is a learning process, and every failure is a step closer to your ultimate hot sauce!
——————————————————————————————————————————–
Recipe 1: Habanero Hot Sauce
Ingredients:
– 550g red Habanero chili peppers
– 3 cloves of garlic
– 425ml water
– 20g sea salt (2% of the total fermentation weight)
Add after fermentation
– 200ml apple cider vinegar
– 50g sugar
1. First, remove the stems from the chili peppers and cut the garlic into quarters. Pop the habaneros, garlic, and water into a blender or use an immersion blender to quickly mix them into a coarse sauce.
2. Pour this into the jar. Spread the legs of the press element, placing it so the sauce is pushed down. Close the lid tightly, put the airlock on top, and fill it with water.
3. Let the jar ferment for at least 10 days at room temperature in a dark spot (away from direct sunlight). We suggest a top shelf in your kitchen, as it's usually a bit warmer there. You can ferment it for longer than 10 days too; it typically takes about 5 days for the fermentation process to really get going.
4. Drain the fermented mixture, but make sure to save 200ml of the liquid. Add this liquid back to the fermented mixture along with 200ml of apple cider vinegar and 50 grams of sugar. Blend it with a blender or immersion blender until you get an even smoother sauce. Give it a taste and add more sugar and/or vinegar if you like. You can strain it if you want it super smooth, or keep it chunky for extra texture!
5. Bring the sauce to a boil and let it gently simmer for 5 minutes. This stops the fermentation, making your sauce last longer in the fridge. If you think it's too thin, you can thicken it with your favorite binder, like cornstarch.
6. Pour the sauce into a clean bottle or jar and screw on the lid. Flip the jar or bottle upside down to create a vacuum seal. Let the sauce cool down, then store it in the fridge.
——————————————————————————————————————————–
Recipe 2: Mexican Chili Hot Sauce
Ingredients:
– 55g dried Mexican chili peppers (2x Ancho, 4x Chipotle, 2x Arbol)
– 5g cumin seeds
– 6 cloves of garlic
– 750ml water
– 16.5g sea salt (2% of the total fermentation weight)
Add after fermentation
– 250ml apple cider vinegar
– 60g sugar
1. First, remove the stems from the dried chili peppers and cut the garlic into quarters. Briefly roast the cumin seeds and dried peppers – this really helps give your Mexican hot sauce a deeper flavor!
2. Pop all the ingredients into the jar. Spread the legs of the press element, making sure all the peppers stay submerged. Close the lid tightly, put the airlock on top, and fill it with water.
3. Let the jar ferment for at least 10 days at room temperature in a dark spot (away from direct sunlight). We suggest a top shelf in your kitchen, as it's usually a bit warmer there. You can ferment it for longer than 10 days too; it typically takes about 5 days for the fermentation process to really get going.
4. Drain the fermented mixture, but make sure to save 250ml of the liquid. Add this liquid back to the fermented mixture along with 250ml of apple cider vinegar and 60 grams of sugar. Blend it with a blender or immersion blender until you get a smooth sauce. Give it a taste and add more sugar and/or vinegar if you like. You can strain it if you want it super smooth, or keep it chunky for extra texture!
5. Bring the sauce to a boil and let it gently simmer for 5 minutes. This stops the fermentation, making your sauce last longer in the fridge. If you think it's too thin, you can thicken it with your favorite binder, like cornstarch.
6. Pour the sauce into a clean bottle or jar and screw on the lid. Flip the jar upside down to create a vacuum seal. Let the sauce cool down, then store it in the fridge.
If you store your homemade sauce in the fridge, it should stay good for at least a year, assuming you've got the right amount of salt and acidity (pH 4 or less) from fermentation and added vinegar. Make sure to keep a close eye on whether it still looks, smells, and tastes good. If not, we recommend tossing the sauce and not taking any chances.
–
If you store your homemade sauce in the fridge, it should stay good for at least a year, assuming you've got the right amount of salt and acidity (pH 4 or less) from fermentation and added vinegar. Make sure to keep a close eye on whether it still looks, smells, and tastes good. If not, we recommend tossing the sauce and not taking any chances.
–
No reviews yet.
| Monday | 8:00 AM - 5:00 PM |
|---|---|
| Tuesday | 8:00 AM - 5:00 PM |
| Wednesday | 8:00 AM - 5:00 PM |
| Thursday | 8:00 AM - 5:00 PM |
| Friday | 8:00 AM - 5:00 PM |
| Saturday | from 8:00 to 12:00 |
| Sunday | Closed |
Burg. Crezeelaan 44A
2678 KZ De Lier
© Westlandpeppers | Webshop by Buro Staal
Our webshop will be closed this coming Friday. Orders placed after 9:30 AM on Thursday, July 31st, will be processed and shipped again on Monday. Thanks for your understanding!





Reviews
No reviews yet.